Quantcast
Channel: Brett McQueen | Ukulele Tricks
Viewing all 86 articles
Browse latest View live

Welcome to Ukulele Tricks’ Brand New Look

$
0
0

Big things are happening here at Ukulele Tricks.

As you probably have noticed, we have a completely brand new look! If you’re reading this in your email inbox or RSS reader, be sure to head over to Ukulele Tricks to check out the new design.

Over the past month, I’ve been working a lot of long days and nights to get this new design ready to go. I’ve spent a lot of time planning, coding, and tweaking because I’ve wanted everything to be just right for you.

This update is a HUGE step forward for Ukulele Tricks, and I hope that you really like it.

When I designed the new look, my goal was to make things look cleaner and easier to find. For example, members of the Ukulele Strumming Tricks video lesson course can login to the course from the top of any page now!

Overall, there aren’t any major changes to the way the site is organized, so you should be able to find everything alright. I encourage you to click around and explore! If you have any questions, don’t hesitate to post a comment below.

Please be patient with me as there might still be some kinks in the design that I have to work out.

What do you think of the new design? I’d love to hear your thoughts. Post your comment below!


How to Play a C Major Scale on Ukulele

$
0
0

Over the next several weeks, we’re going to look at the twelve major scales and how to play those on ukulele. In the most basic way, a scale is a collection of notes arranged in ascending or descending order.

Every scale is built upon a root note called tonic. So in a C major scale, the tonic note of the scale is the note C.

There are only twelve major scales because there are only twelve notes in Western music from which we can build a scale. If we know a C major scale like the back of our hand, we can easily modify it later to play the other major scales.

For a broader explanation about scales, check out my post Ukulele Scales Explained for Beginners.

Why You Need to Learn Scales

Let’s be honest. While memorizing scales and patterns is an excellent exercise for your mind, that process can be quite boring and monotonous. I’m not going to try to tell you otherwise. :) (How’s that for some motivation?!)

However, we don’t learn scales because they are so fun. We learn scales because they equip us to play music that we might have shied away from before just because we didn’t understand it. The biggest part to successfully playing a piece of music is understanding what that song is doing. Scales allow you to understand any song by giving you a context and a framework for the chords and notes you are playing.

Let me unpack what this really means.

For example, if you know your scales, you don’t need a chord diagram (such as my chord library) to tell how you to play a certain chord. This means if you see a weird chord like Gadd9, you know which note to add to the chord and where to add it on the fretboard to make the chord an “add9.”

If you’re a songwriter and you know your scales, all the sudden you have a palette of creative options you can select from to build and create a beautiful and memorable song.

If you enjoy fingerpicking songs, you can look at a piece of sheet music and know exactly what notes to play and where to play them on the fretboard.

It’s true that you can play hundreds of songs without knowing a thing about scales or music theory, but if you really want to take your ukulele playing to the next level, and unlock a lot of creative options, learning scales is essential.

How to Build a C Major Scale

For these lessons on scales, we’re starting with a C major scale because it is the only major scale without any sharps or flats. If you’re at all familiar with a piano, this means the C major scale is only played on the white keys (no black keys).

There are only seven different notes in a C major scale.

The C major scale uses the notes: C, D, E, F, G, A, B.

As you can see on the above musical staff, the C major scale starts on C and goes up to B. After the B note, the scale starts to repeat again, but on a C note an octave higher.

Intervals

As I explained in my previous lesson Ukulele Scales Explained for Beginners, the quality of a scale (e.g. major, minor, etc.) is determined by the intervals between the notes of the scale.

The intervals we want to concern ourselves with are half step and whole step intervals.

Half Step & Whole Step

As you can see, when you play a note one fret higher than the original note, this is an interval of a half step. When you play a note two frets higher than the original note, this is an interval of a whole step.

A major scale has a specific pattern or arrangement of whole steps and half steps.

Major Scale Interval Pattern

This section here is the key to playing ANY major scale on ukulele.

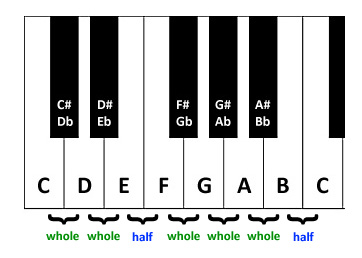
If we look at the piano keys, it’s easy to see the pattern we use for a major scale. Because in this lesson we are looking at the C major scale, the scale demonstrated on the piano keys is a C major scale.

Again, since this is a C major scale, there are no sharps or flats (we don’t play the black keys). If we start on the C note at the far left and ascend to the B note to the right, we see that our interval pattern for a major scale is whole, whole, half, whole, whole, whole, half.

If we know this pattern, this means we can start on any note of the ukulele, apply this interval pattern of whole steps and half steps, and we have a major scale!

How to Play a C Major Scale on Ukulele

Now that we know how a major scale is built, we can apply this structure to playing any scale. As I mentioned, we want to start learning the C major scale because it has no sharps or flats. If we know the C major scale, we can use this as a starting point for easily learning other scales.

The Easiest Way to Play a C Major Scale

Like I said above, we can apply that whole step, half step interval pattern to any note to build a major scale. However, in order to play a C major scale, we need to build our major scale by starting on a C note (tonic!). Makes sense.

Let’s use our open C string (second to top string) as a starting point to build our C major scale:

As you can see, we start by plucking our open C string.

Because we know that the first interval of a major scale pattern is a whole step, we know we have to go up two frets (a whole step!) to get to the D. From there, we continue to apply the whole step, half step pattern of a major scale.

Because we started on a C, this is a C major scale.

The Most Practical Way to Play a C Major Scale

The thing about scales on the ukulele is that it isn’t very practical to play a scale just on one string. The best way to learn scales on the ukulele is to learn them across all the strings and in different positions.

There are five positions from where we can play the notes of a C major scale on the fretboard of the ukulele. For all these positions, the blue note represents the tonic note of a C major scale (the note C is tonic!).

C Major Scale: Position #1

For this position, you want to assign your index finger to fret any of the notes that fall in the 1st fret. Assign your middle finger to fret any of the notes that fall in the 2nd fret, your ring finger to the 3rd fret, and your pinky to the 4th fret.

C Major Scale: Position #2

Like the last position, assign your index, middle, ring, and pinky finger to fret the notes that fall between the 2nd and 5th frets.

C Major Scale: Position #3

This position is a little different. For the notes on the top two strings, your four fingers will hover over the 4th to 7th frets. When you get to the notes on the bottom two strings, your fingers will shift to hover over the 5th to 8th frets to fret the notes.

C Major Scale: Position #4

Assign your four fingers to fret the notes that fall between the 7th and 10th frets.

C Major Scale: Position #5

This is another position where you will need to shift your fingers. For the notes that are played on the top two strings, hover your four fingers over the 9th to 12th frets. For the notes that are played on the bottom two strings, hover your four fingers over the 10th to 13th frets.

If you have a smaller sized ukulele, it’s quite possible you don’t even have enough frets to play this 5th position. That’s okay!

How to Practice These Scale Positions

Learning the pattern of these five different positions is actually really easy with a little bit of practice. You’ll find that these patterns are easy to remember and not that difficult to play in the long run.

The biggest challenge is remembering the individual note names. So as you practice, it’s important to say out loud the note you are fretting.

It’s also extremely important to remember where the tonic notes are across the fretboard. If you can find the tonic note, you can more easily figure out how to play the rest of the scale.

As you practice these scale positions, I would only dedicate 15 to 30 minutes a day. You can practice more if you’d like, but what you’ll find is that your brain will need a rest in order to retain these different scales.

Final Notes

The last thing I want to quickly mention is about the ukulele tuning.

Because the top string of the ukulele is tuned higher than the middle two strings, when you’re playing these positions, it’ll sound a little weird if you’re starting on the top string, because the notes being played in succession are not in ascending order. If this throws you off too much, you can just focus on the position of the bottom three strings for now.

There is A LOT of information in this post. If something didn’t click for you, I encourage you to read this over again very slowly. As always, you can post a question or a comment right below this lesson! I’d love to hear from you and try to help in anyway I can.

We’re going to continue to look at the eleven other major scales on the ukulele. It’s a lot, but if we learn the C major scale, the other eleven are actually quite easy. You’ll see in the next lesson. :)

C Major Scale: All Positions

What Is Your Biggest Challenge As a Ukulele Player?

$
0
0

One of the most exciting aspects of Ukulele Tricks for me is hearing from you.

I’ve tried to offer a variety of lessons and information about the ukulele on Ukulele Tricks, but I realize with as many people that use the site, I’ve probably overlooked something, and I know for a fact from all of our conversations that you have a lot of really great ideas for what you’d like to learn!

In the comments area below, I want you to answer the following question:

What is your biggest challenge as a ukulele player?

In other words, what do you want to be able to do better as a ukulele player? What do you want to learn? If you could improve one part of your playing, what would it be?

Your answer could be as simple as, “My biggest challenge is fingerpicking,” or, “I can’t remember how to play certain chords.”

It doesn’t matter what it is. I want to hear an honest evaluation of where you feel like you’re at as a ukulele player.

All of your responses will help me continue to create lessons and content on Ukulele Tricks that are extremely helpful and relevant to your current challenges. I want to be teaching you things that you want to learn and that are beneficial to you!

Let’s hear it. Post your comment below. I read every response.

How to Play a G Major Scale on Ukulele

$
0
0

Right now, we are in a big lesson series dedicated to learning the ukulele fretboard. We’re doing this by learning all major scales in the twelve different keys. This is the second lesson in the series. If you’re just joining us, welcome!

In the first lesson, we looked at how to play a C major scale on the ukulele. By now, you should be able to comfortably play a C major scale in all positions across the ukulele fretboard.

Learning the C major scale is a critical starting point. All of the lessons from here on out will be building off of our understanding of a C major scale.

So again, if you haven’t learned the C major scale, go here before reading on. If you don’t have a solid understanding of that lesson, this lesson probably won’t make much sense to you.

From here on out, I will be structuring each of these major scale lessons very similarly. First, we will look at the theory behind the scale, or how to build the scale, and then, we will look how to play the scale across the ukulele fretboard.

How to Build a G Major Scale

In the last lesson, we learned that we can build a major scale from any note by applying a whole step, half step interval pattern. We remember that a major scale interval pattern is whole, whole, half, whole, whole, whole, half.

Let’s start on a G note and apply this interval pattern. We will use an example of the piano keys to help us visualize the scale.

G major scale on piano

From G to A, we have a whole step, from A to B, we have a whole step, from B to C, we have a half step, from C to D, we have a whole step, from D to E, we have a whole step, from E to F#, we have a whole step, and from F# to G, we have a half step.

From this, we see that the notes found in a G major scale are: G, A, B, C, D, E, F#, G.

We can see a G major scale represented on a musical staff:

G major scale

The most important thing to know about a G major scale is, unlike a C major scale, it has one sharp.

The term “sharp” refers to a note that has been raised a half step. A sharped note is indicated by a “#” symbol. If we go back up to our piano keys example, you’ll see that in order to maintain the whole step, half step interval pattern for a major scale, we had to raise the F natural note up a half step.

Lastly, we can apply this whole step, half step major scale interval pattern to the ukulele fretboard. Because we want to build a G major scale, again, we have to start on a G note and then apply this pattern.

Let’s build a G major scale starting on the open G string:

G major scale on ukulele

The blue dots represent the tonic note of the scale (G). Again, if this discussion about whole steps and half steps doesn’t make sense to you, go to the previous lesson to review.

Now that we know how to build a G major scale, let’s learn some more practical ways to play this scale across the ukulele fretboard.

How to Play a G Major Scale on Ukulele

We want to be able to play a G major scale in five different positions across the ukulele fretboard. To do this, we are going to refer to the C major scale we learned in the last lesson. Again, by now, you should be pretty comfortable and familiar with the C major scale.

The cool thing is that you pretty much already know how to play a G major scale. Check this out.

Let’s list the notes in a G major scale:

G, A, B, C, D, E, F#, G

Now, let’s list the notes in a C major scale:

C, D, E, F, G, A, B, C

Tell me. Which single note is found in the G major scale that isn’t found in the C major scale?

The F# is the only different note.

This means all we need to do is take our C major scale positions that we learned in the last lesson and raise all the F notes up a half step to F#. If we do that for each of the five positions we learned, we have completely learned how to play a G major scale in all positions across the ukulele fretboard!

Pretty nifty, huh?

G Major Scale: Position #1

G major scale ukulele position 1

For this position, assign your index finger to fret any of the notes that fall in the 1st fret, your middle finger to fret any of the notes that fall in the 2nd fret, your ring finger to the 3rd fret, and your pinky to the 4th fret.

Compare this position with the first position of the C major scale. As you can see, it’s not much different. We are just raising up the F note to an F# on the second to bottom string.

G Major Scale: Position #2

G major scale ukulele position 2

Like the last position, assign your index, middle, ring, and pinky finger to fret the notes that fall between the 2nd and 5th frets.

G Major Scale: Position #3

G major scale ukulele position 3

This position is a little different. For the notes on the top two strings, your four fingers will hover over the 4th to 7th frets. When you get to the notes on the bottom two strings, your fingers will shift to hover over the 5th to 8th frets to fret the notes.

G Major Scale: Position #4

G major scale ukulele position 4

Like the last position, for the notes on the top two strings, your four fingers should hover over the 6th to 9th frets. When you get to the notes on the bottom two strings, your fingers will shift to hover over the 7th to 10th frets.

G Major Scale: Position #5

G major scale ukulele position 5

Assign your four fingers to fret the notes that fall between the 9th and 12th frets.

How to Practice These Scale Positions

Since you know how to play a C major scale, the G major scale shouldn’t throw you for too much of a loop. The key with practicing these new positions is to be very conscious and aware of what notes you are playing.

As you’ll notice, there are already some patterns repeating themselves between these two scales. For example, if you look at position #4 of the C major scale, and then compare it with position #2 of the G major scale, it’s the exact same fingering.

You’ll notice that these positions will repeat themselves like this in different places on the fretboard for different scales.

This is great because our fingers get used to these different positions pretty quickly. However, this can cause a bit of a challenge in the long run because we don’t want to just be learning the finger patterns. What we really want to know is what notes we are plucking and why we are plucking them. So again, as you pluck each note of these scales, continue to verbalize the note you are plucking.

As you practice the G major scale, continue to incorporate the C major scale in your practice too.

Final Notes

There is a lot in this lesson!

Take your time with it. It’s possible you’ll need to spend a couple weeks on all of this. If something didn’t make sense, don’t hesitate to reread it.

In the last lesson, there were a lot of great questions that were brought up in the comments area. When we’re looking at a topic like scales, there are bound to be a lot of different questions. This is good! Chances are somebody else is asking those same questions too, so don’t be shy.

Post your questions and comments below.

G Major Scale: All Positions

G major scale ukulele all positions

How to Play an F Major Scale On Ukulele

$
0
0

This lesson is apart of a larger lesson series that will help us learn the ukulele fretboard. So far, we’ve learned how to play a C major scale and a G major scale on ukulele. Now, it’s time to learn how to play an F major scale.

Scales not only help us learn the ukulele fretboard, but they also allow us to understand the music we are playing. For example, if we know the notes across the fretboard, we can build chords, craft solos, and look at a piece of sheet music and play it.

Each of these lessons build on the other, so if you’re just joining us, you will want to start learning the C major scale first.

Alright. Are you ready? Let’s do this!

How to Build an F Major Scale

First, we want to build an F major scale in theory. This way, when we get to actually playing these scales on the ukulele, we understand what we’re playing.

You might be wondering why I chose to teach an F major scale and a G major scale after a C major scale. If you recall, a G major scale has only one sharp (#). As you’ll find, once we build an F major scale, the scale has only one flat (b). Remember that sharps raise the pitch of a note a half step; flats lower the pitch of a note a half step.

As you remember, a C major scale has no sharps or flats, so it makes sense that the next easiest scales to learn would be a G major and F major, since they are only changing one note from a C major scale.

Do you remember the major scale interval pattern we talked about in the first scale lesson? It is whole, whole, half, whole, whole, whole, half.

Because we want to build an F major scale, we can start on an F note, apply this pattern, and build a major scale. Let’s visualize this on the piano keys.

From F to G, we have a whole step, from G to A, we have a whole step, from A to Bb, we have a half step, from Bb to C, we have a whole step, from C to D, we have a whole step, from D to E, we have a whole step, and from E to F, we have a half step.

From this, we see that the notes found in an F major scale are: F, G, A, Bb, C, D, E, F.

We can see an F major scale represented on a musical staff:

Let’s build an F major by starting on the F note on the 1st fret of the E string.

Notice the pattern of half steps in whole steps in the above example by looking at how many frets separate the notes in the scale.

How to Play an F Major Scale on Ukulele

We want to be able to play an F major scale in five different positions across the ukulele fretboard. To do this, we are going to refer to the C major scale we learned in the last lesson. Again, by now, you should be pretty comfortable and familiar with the C major scale.

Tell me again. What is the only flatted note in an F major scale?

Bb.

All of the other notes in an F major scale are notes we already know how to play on the ukulele. This means we can take each of the five C major scale positions we learned and change all the B notes to Bb.

F Major Scale: Position #1

For this position, assign your index finger to fret any of the notes that fall in the 1st fret, your middle finger to fret any of the notes that fall in the 2nd fret, your ring finger to the 3rd fret, and your pinky to the 4th fret.

Compare this position with the first position of the C major scale. As you can see, it’s not much different. We are just lowering the B note to a Bb on the top string and bottom string.

F Major Scale: Position #2

This position is a little different. For the notes on the top two strings, your four fingers will hover over the 2nd to 5th frets. When you get to the notes on the bottom two strings, your fingers will shift to hover over the 3rd to 6th frets to fret the notes.

F Major Scale: Position #3

Like the last position, for the notes on the top two strings, your four fingers will hover over the 4th to 7th frets. When you get to the notes on the bottom two strings, your fingers will shift to hover over the 5th to 8th frets to fret the notes.

F Major Scale: Position #4

Assign your index, middle, ring, and pinky finger to fret the notes that fall between the 7th and 10th frets.

F Major Scale: Position #5

For the notes on the top two strings, your four fingers will hover over the 9th to 12th frets. When you get to the notes on the bottom two strings, your fingers will shift to hover over the 10th to 13th frets to fret the notes.

Final Notes

By now, you’re probably noticing a lot of the same patterns between the C major, G major, and F major scales. This is nice because your fingers are probably getting used to many of these shapes.

However, since your fingers are getting used to these shapes, you have to be really intentional about saying the notes you are fretting out loud. The goal in all of this is to understand what you’re playing. That understanding will help you in the long run. Shapes will only take you so far.

If you’re looking for some practical ways to apply your newly acquired knowledge of the ukulele fretboard, take a look at my post 3 Easy Songs You Can Fingerpick On Ukulele Today. For each of the songs I teach, I include sheet music. I recommend printing this music off and identifying the notes on the staff and seeing where those notes fall on the ukulele fretboard.

As always, if you have any questions, don’t hesitate to post your comment below! Let’s talk about it.

F Major Scale: All Positions

Tuning Your Ukulele to Low G

$
0
0

For some of my video lessons on Ukulele Tricks, my tenor ukulele is tuned to low G tuning, sometimes referred to as linear tuning. This means, while you and I can play along together using the same chord positions, the overall sound comes across as slightly different.

Ukulele Tuning

In standard ukulele tuning, the top g-string of the ukulele is tuned higher than the middle two strings of the ukulele. More specifically, the top g-string is tuned to the “G” note above middle-C on a piano (learn more about standard ukulele tuning).

In low G tuning, all of the strings stay tuned the same except the top g-string is tuned down an octave to the “G” note below middle-C, as shown in the following figures:

Low G ukulele tuning

Low G tuning represented on the piano

Low G ukulele tuning on music staff

Low G tuning represented on the music staff

By tuning the top g-string down an octave, you add five additional notes to the bottom of the ukulele’s range of pitch. This produces a fuller, deeper sound to the ukulele.

Often times, people prefer the low G tuning on a tenor sized ukulele versus a soprano or concert sized (read more about ukulele sizes). You can see why a lot of ukulele players have more than one ukulele! This allows them to tune each ukulele to a different tuning.

Please note that if you want to tune your ukulele to low G tuning, you need a special low G string set for your ukulele. If you try to tune the g-string of a regular ukulele string set down an octave, you will find that the string doesn’t hold tension very well and doesn’t stay in tune. To remedy this, you need a thicker, wound low G-string.

Whenever I tune my ukulele to low G, I like to use Aquila’s low G string set. You can buy a pack online depending if you have a soprano, concert, or tenor sized ukulele (links take you to product pages on Amazon for Aquila low G strings).

To tune up your low G string set, use a chromatic tuner (I recommend it), or use the “low G” setting on my free ukulele tuner tool.

If you run into any problems tuning your ukulele to low G, just post your comment below! I’d love to help.

Finding an Easier Way to Play a Bb Chord on Ukulele

$
0
0

Bb chord diagramA common question I see in the Ukulele Strumming Tricks video lesson course, as well as in email, is about how to play a Bb chord. If you aren’t familiar, a Bb chord is played on the ukulele as shown in the diagram to the left.

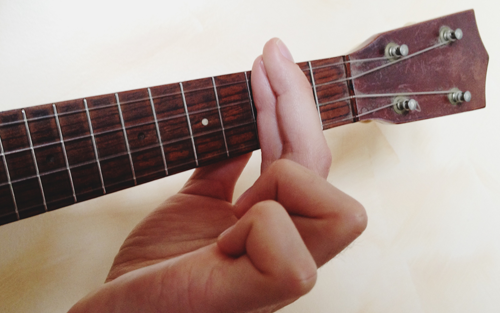
As normally instructed, to play a Bb chord, use your index finger to hold down or barre the bottom two strings of the ukulele at the 1st fret; place your middle finger on the 2nd fret of the third string and your ring finger on the 3rd fret of the top string, as shown in the following picture.

A common way to play a Bb chord

This position requires you to bend your index finger in what can seem like a really difficult and uncomfortable way. If you struggle with stiffness or even arthritis in your fretting hand, this position can seem near impossible. Not to mention, this way of playing a Bb chord requires quite a bit of strength.

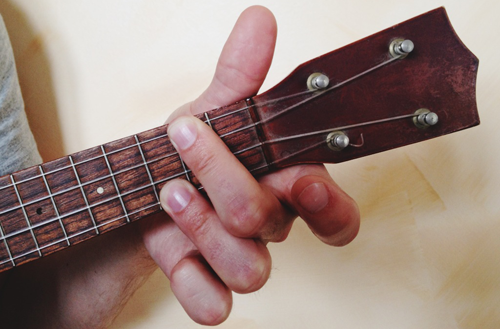
In my conversations with you, a lot of you have found an alternative way to play a Bb chord that works extremely well. To play a Bb chord, rather than barring only the bottom two strings at the 1st fret, barre all the strings with your index finger. This means, you hold down all four strings at the 1st fret with your index finger. Then, position your middle finger on the 2nd fret of the third string and your ring finger on the 3rd fret of the top string. Check out the following picture to see a Bb chord played in this alternate position.

An alternate way to play a Bb chord

Note: Ensure the end of your thumb is firmly planted on the neck of the ukulele to provide leverage and support.

The benefit to this alternate position is that you are able to keep your index finger extended, rather than bending it in an awkward way. Many find this much more comfortable, and because you are using the entire index finger to hold down the strings, the amount of strength and energy required to fret the strings is a little less.

I want to hear from you. How do you play a Bb chord? Any tips that you have for your fellow ukulele players? Post your comment below!

Knowing When to Change Chords While Strumming a Song

$
0
0

For the most part, ukulele songs are displayed online and in print using chord charts. A chord chart includes the lyrics of a song with letters above to indicate the chords. Most of the ukulele songs I’ve posted on Ukulele Tricks are presented through chord charts.

The big downside to chord charts is that there is no indication of the rhythm (or strumming) of a song. By itself, a chord chart doesn’t inform you about how long to strum a chord or when to exactly change a chord. The chord letters are written to line up with the lyrics, as to try to indicate when the chord changes happen, but as you’ve probably found, it’s not that easy.

In this lesson, I show you some ways I go about approaching a chord chart and learning a new song. More specifically, I give you some practical examples and exercises from actual songs that allow you to get the knack for identifying chord changes in a song, while keeping a steady strumming pattern rhythm.

The following figure shows the strumming pattern I will use as an example in this lesson. If you are a complete beginner and need some direction, watch this video lesson before proceeding, which demonstrates the following strumming pattern:

3 Main Ways Chord Changes Happen In Songs

When you approach a chord chart, you need to know three of the most popular ways chords change throughout a song. Most songs have chord progressions that follow these three rules.

Changing Chords Every Measure

Most songs are counted in four (4/4 time signature). This means you count one, two, three, four to the rhythm or strumming of the song. In a song counted in four, each group of four beats is considered one measure. The strumming pattern in the figure above is played over the span of one measure.

If this talk about counting and measures is confusing, be sure to watch my video lesson Ukulele Strumming Patterns for Beginners.

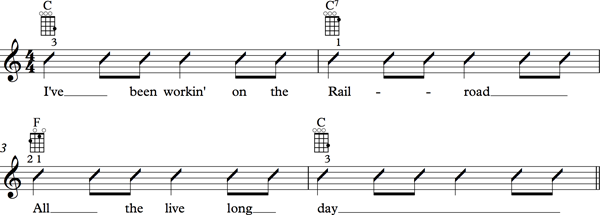
As a rule of thumb, the majority of chords in a song change on the first beat of a measure. For example, in the popular folk song “I’ve Been Working On the Railroad”, in the first line of the song, chord changes occur on the first beat of every measure, as shown in the following figure:

If you click over to the chord chart for “I’ve Been Working On the Railroad”, you see how the above rhythm chart example is represented in the chord chart:

C                        C7
I've been working on the railroad
F                 C
All the live long day

Changing Chords Every Two Measures

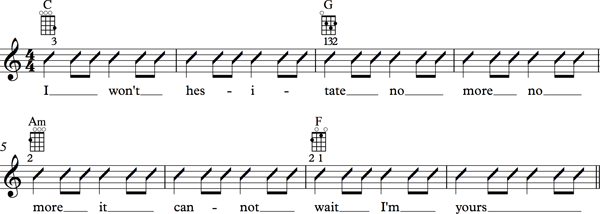
While chords often change on the first beat of a measure, chords in a song don’t always change every measure. Sometimes you strum a chord for more than one measure. The following example shows a Jason Mraz “I’m Yours” chord progression, where each chord is strummed for two measures. This means you play the strumming pattern twice for each chord.

If you were just following a chord chart for “I’m Yours”, this is how the above would look:

C           G                Am              F
I won't hesitate no more, no more; it cannot wait I'm yours

Changing Chords In the Middle of a Measure

Chord changes sometimes happen in the middle of a measure–often times on the third beat. For example, in the first lines of “Ain’t She Sweet”, there is an occasional chord change on the third beat:

And this is how this progression would look in a chord chart:

C6    Edim  G7
Ain't she   sweet
-       C6      Edim     G7
See her walking down the street

Learning to Play a Song from a Chord Chart

Learning a song from a chord chart is actually pretty difficult–even for a seasoned ukulele player. This is because a chord chart gives you no indication of the rhythm of the song or how the song is counted. Because of this, it becomes a bit more difficult to find a strumming pattern that fits with the song.

Here’s how I approach learning a new song, which allows me to find the right strumming pattern for a song.

Tip #1: Listen, Listen, Listen

So you’ve found the chord chart of your favorite song, and you want to figure out how to play it on ukulele. Before even picking up your ukulele, at first, you must listen to the song. Find a recording of the song on YouTube or download it off of iTunes.

As you listen, do the following things:

  1. Tap your toe to the beat. Try to count along to a count of four. If that doesn’t quite fit, try a count of three to see if it fits better.
  2. Pay attention to where chord changes happen. When you hear a “shift” in the harmony or melody, this usually means a chord has changed.
  3. Sing or hum the melody of the song. The tricky part is to sing and strum at the same time, so you’ll want to have the melody of the song ingrained in your brain so it’s second nature.

Listening is so important because it gets the song stuck in your head. It also allows you to pick up on things like rhythm and melody, which will inform you for the next step.

Tip #2: Start with Down Strums

Once you’ve listened to the song, take a look at the chord chart for the song and start learning the chords. When you are comfortable, start strumming the first chord of the song with just down strums.

Always start with down strums. Strumming isn’t about being fancy. It’s better to be able to play a song with just down strums rather than playing a really fancy, complicated strumming pattern that is played out of rhythm.

Practice changing between the chords of the song. As shown in the examples above, try switching the chords on the first beat of every measure. If that doesn’t feel right, try switching chord every two measures, and if that’s not working, experiment with changing chords in the middle of a measure.

At this point, you are just trying to get a sense for how and when the chords change. You are going to have to experiment. Use your ear, and don’t be afraid to go back and listen to the song.

Tip #3: Strum First, Sing Later

The tricky part about any song is that more often than not, the rhythm of the melody of the song (the part you sing) is a little different than the strumming. This means your singing won’t always match up completely with your strumming. This complexity is normal in any piece of music and is often what makes a piece worth listening to.

When it comes to singing and playing at the same time, it’s important you’ve practiced your strumming to the point where it becomes second nature. This way when you try singing a vocal line you don’t get thrown off. It’s a lot like patting your head and rubbing your stomach at the same time!

For more on singing and playing the ukulele at the same time, check out my lesson How to Sing and Play Ukulele At the Same Time.

Conclusion

A lot of the ideas presented in this lesson are unpacked more in my comprehensive video lesson course Ukulele Strumming Tricks. If you are a complete beginner, or if you want to have a more in-depth understanding of rhythm and strumming on the ukulele, I recommend joining me in my course.

How’s the strumming going for you? What questions do you have? Do you have any tips that I might have missed? Post your comment below.


5 Effective Strumming Patterns for Beginners

$
0
0

In this lesson, I show you five strumming patterns you can use to play thousands of different songs on ukulele (I’m not exaggerating!). These are my “go to” strumming patterns. I use them all the time and have used them in a lot of video performances on the site (e.g. You’ve Got a Friend In Me, I’ve Been Working On the Railroad). These patterns are versatile, simple and work for most songs.

Note: A few of these strumming patterns are taught in the Ukulele Strumming Tricks video lesson course. For sake of brevity, in this lesson, I won’t go into as much detail explaining these patterns as I would in my course. If you are looking for a progressive easy-to-follow, step-by-step practice plan towards becoming a better strummer with deeper explanations, I highly recommend my Ukulele Strumming Tricks course.

Foundations of Strumming

The first thing to realize about strumming is that it’s not about how fancy or complicated you make a strumming pattern. Since strumming is a form of rhythm, in order to be effective, it must be consistent and steady. A steady, consistent strumming rhythm is always more pleasing to listen to than a really complicated strumming pattern played out of time.

The following strumming patterns, as demonstrated in the video, are played in 4/4 time signature. This means each pattern is played to a steady, consistent count of four: 1, 2, 3, 4, repeat. You can use these patterns for any song counted in four. As you practice each of these strumming patterns, count out loud, and even use a metronome to keep your strumming as rocksteady as possible.

Strumming Pattern #1

Before learning any other strumming pattern, learn this one. This pattern is very simple, as it is only down strums, but it is highly effective. For example, in my performance of Leonard Cohen’s “Hallelujah”, I use all down strums for the last half of the song.

As you practice this, set your metronome, count out loud, and focus on lining up your down strums with each beat. Try to make your strums as even in tone and in volume.

Strumming Pattern #2

When you have the previous pattern mastered, add in up strums between each down strum to make the pattern more interesting. You would count these up strums in between the main beats by counting the word “and” like: 1 and, 2 and, 3 and, 4 and, repeat.

In addition, practice changing between chords on the first beat of the strumming pattern. For example, you might switch between a C, Am, and F chord. Take your practice further by coming up with your own chord progressions too.

Strumming Pattern #3

This strumming pattern combines the first two patterns. For this pattern, insert an up strum on the “and” of beats 2 and 4.

Strumming Pattern #4

You can get creative by rearranging the order of your down strums and up strums within the count of four. This pattern is like pattern #3, but in this pattern, you insert an up strum on the “and” of beats 1 and 3.

Strumming Pattern #5

This strumming pattern is sometimes referred to as the calypso strum. This pattern is the most complicated out of all of the patterns. This is because the down strum on beat 3 is removed and you only play an up strum on the “and” of the third beat. You’ll want to be sure to watch the video to get a sense for how this pattern sounds and feels. Once you get it down, you’ll find that it’s an easy pattern to apply to a lot of different songs.

Practicing Strumming Patterns

I recommend practicing these strumming patterns while playing just a C chord. Strumming is all about practicing a pattern to the point where it comes second nature and you don’t have to think about it too much. Don’t forget to practice these strumming patterns at a slow and fast tempo.

After practicing each pattern for awhile, practice changing between chords. Check out my lesson “Knowing When to Change Chords While Strumming a Song” for some practice examples.

When you’re ready, try applying these strumming patterns to a few different songs:

How’s the strumming going for you? What questions do you have? I’d love to hear from you.

Post your comment below.

Using Your Baritone Ukulele to Follow Along with My Standard-tuned Lessons

$
0
0
Baritone ukulele

Cordoba 20BM baritone ukulele

At the moment, I do not have any songs or lessons that specifically pertain to the baritone ukulele. I realize this is disappointing and a huge bummer for you baritone players, and I want you to know that I plan to create some baritone ukulele lessons in the future.

Until then, I want to show how you can use your baritone ukulele to still follow and play along with me in my standard-tuned lessons on UkuleleTricks.com. Many of my students in my Ukulele Strumming Tricks course, who own a baritone ukulele, use these tips to follow along and improve their strumming right with me.

1. Figuring Out Chords on the Baritone Ukulele

If you don’t know already, soprano, concert and tenor ukuleles are commonly tuned to standard tuning: g-C-E-A. A baritone ukulele is tuned lower like the bottom four strings of a guitar: D-G-B-E. A baritone ukulele has a deeper, lower-pitched sound. Learn more about the differences between ukulele types here.

Because of the differences in tuning, at the moment, the chord diagrams on UkuleleTricks.com sound in a different key when played on a baritone ukulele. This means, in order to strum along with me in my video lessons, you are required to figure out the chord positions separately on your baritone ukulele.

The easiest way to figure out chords on a baritone ukulele is to search the internet for ‘guitar chords’ and pay attention only to the bottom four strings of the guitar chord diagrams. The bottom four strings of a guitar chord diagram will give you the chord position that you play on your baritone ukulele.

When you’ve figured out the chord positions on your baritone ukulele, you can play and strum those chords along with me in my video lessons, or anyone else that is playing a standard tuned ukulele. The finger positions for the chords will be different between the ukuleles, but if played correctly, they will sound together in the right key.

I prefer a different way of going about using your baritone ukulele to play along with standard tuned ukuleles. Let’s take a look.

2. Use a Ukulele Capo to Transpose Your Playing to Standard Tuning

Shubb ukulele capo

Shubb L9 ukulele capo

One of the easiest ways to follow along with me in my videos is to use a ukulele capo on the 5th fret of your baritone ukulele’s neck.

A ukulele capo is a small device that barres (that is, holds down) all of the strings at whichever fret you place the capo. By placing the capo at the 5th fret, you transpose your baritone ukulele’s tuning to G-C-E-A, which are the notes in standard linear tuning.

This means with the ukulele capo you can play the same chord positions on your baritone ukulele that I am using in my ukulele lesson videos, and your playing and my playing will sound together in the same key.

I recommend the Shubb L9 ukulele capo because of the ability to adjust how hard the capo clamps around the neck of your ukulele. The Kyser banjo capo is a cheaper and worthwhile alternative, but in my experience, if you’re not careful with how you place the Kyser capo, it can sometimes pull your strings out of tune relative to one another.

Moving Forward

My intention is to give you baritone ukulele players some love and provide you all with some really great baritone ukulele lessons in the future. Until then, hopefully this can help you bridge the gap that can sometimes exist with playing along with standard-tuned ukuleles.

Are you a baritone ukulele player? What questions do you have about playing your baritone ukulele with standard-tuned ukuleles? Tell me by posting your comment below.

Announcing my new book Ukulele Exercises For Dummies, plus win a free ukulele

$
0
0

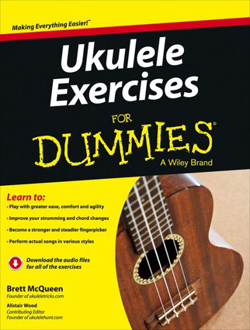
Ukulele Exercises For Dummies, by Brett McQueenAbout nine months ago, I embarked on a grand adventure in the world of teaching the ukulele. It’s ended up being one of the most amazing projects I’ve ever had the opportunity of being apart of, and now, after much hard work and many long days, I finally get to tell you about it! With more excitement than I can contain, in less than 12 days (April 15th, 2013, to be exact), I am releasing my brand new ukulele lesson book titled Ukulele Exercises For Dummies.

This book is a practice-based book created for ukulele players who want to take their technique and skills to the next level. Ukulele Exercises For Dummies focuses on many different aspects of playing the ukulele like strumming, fingerpicking, learning the ukulele fretboard, soloing in different styles and much more. The book contains hundreds of different exercises and a broad selection of practical songs in various styles that get you making beautiful-sounding music on the ukulele.

Right now, pre-order the book for a special discounted price on Amazon:

For my Australian, New Zealand, or worldwide friends, you can pre-order the book here:

Note: After the book officially releases, the price will go up, so be sure to take advantage of the special pre-order price these online bookstores are offering.

To write this book, I teamed up with Wiley Publishing (the For Dummies people). Alistair Wood, author of Ukulele For Dummies and founder of Ukulele Hunt, was so kind to recommend me to author this book. Even more so, I was absolutely honored to have him as a contributing editor for the book. Al’s role and expertise was pivotal in writing Ukulele Exercises For Dummies. I am very thankful for his and the rest of the team at Wiley’s hard work.

How This Book Will Help You

I wrote Ukulele Exercises For Dummies to be a book for ukulele players who want to take the next step and push their ukulele playing to a higher level. Still though, I wrote the book in a way that allows even entry-level ukulele players to jump right in and start improving their skills. In a whoppin’ 240 pages, I cover things like:

  • Creating rock-steady strumming patterns and rhythms using a variety of ukulele chords
  • Practicing advanced strumming techniques like the chnk strum, muted strums and rolling finger strums
  • Becoming a better fingerpicker with patterns, arpeggio exercises and solo fingerpicking pieces
  • Expanding your fretboard knowledge and crafting your own rock, blues and jazz riffs and solos
  • Applying techniques to play actual songs on the ukulele – everything from the classic ukulele tunes to the 12 bar blues
  • Downloadable audio files of the exercises found in the book (256 total audio tracks, to be exact!)

Ukulele Exercises For Dummies is a little different than most books in that the book is more of a reference book rather than one you would read from cover to cover. I wrote it in a way so you can skip around and focus on practicing the things that interest you most.

Inside the Cover (Table of Contents)

Ukulele Exercises For Dummies, by Brett McQueenUkulele Exercises For Dummies is organized in a way where you can jump around to the parts of playing ukulele that interest you most. As you use this book, don’t hesitate to select exercises and songs to practice from different chapters.

The following gives you a bird’s-eye view of what you’ll find in the book. Throughout the chapters, there are many practical songs that give you an opportunity to apply your skills and technique. To see the songs and specific techniques you learn in the book, download and see a more in-depth table of contents here.

Introduction

Part I: Getting Started with Ukulele Exercises

  • Chapter 1: Preparing to Practice
  • Chapter 2: Warming Up for Practice

Part II: Becoming a Better Strummer

  • Chapter 3: Foundations For Strumming
  • Chapter 4: Building a Repertoire of Strumming Patterns
  • Chapter 5: Taking Strumming Patterns to a Higher Level
  • Chapter 6: Refining Advanced Strumming Techniques

Part III: Becoming a Better Fingerpicker

  • Chapter 7: Examining Fingerpicking Technique
  • Chapter 8: Developing Rhythmic Fingerpicking Patterns
  • Chapter 9: Improving Your Solo Fingerpicking Skills
  • Chapter 10: Taking a Deeper Look at Single-Note Fingerpicking Techniques

Part IV: Mastering the Ukulele Fretboard

  • Chapter 11: Learning the Fretboard with Major Scales
  • Chapter 12: Taking On Three Minor Scales
  • Chapter 13: Commanding the Fretboard with Chords
  • Chapter 14: Using Scales to Solo and Improvise

Part V: The Part of Tens

  • Chapter 15: Ten Ways to Improve Your Practice Times
  • Chapter 16: Ten Tips for Every Performing Ukulele Player

Don’t forget to download and see a more in-depth table of contents here.

Grab the Table of Contents and Sample Chapter

Ukulele Exercises For Dummies sample chapterAs a way to say thank you for all of your support and patience while I was writing this book, please download, preview and enjoy the full Chapter 8 ‘Developing Rhythmic Fingerpicking Patterns’ from Ukulele Exercises For Dummies.

Download the full, sample chapter here.

Chapter 8 explores various rhythmic fingerpicking patterns that can be used to fingerpick the chord progression of a song. In this chapter, you use your fingerpicking skills to fingerpick two different songs: The Water Is Wide and I Am a Poor Wayfaring Stranger, made popular by Johnny Cash and Emmylou Harris. Rhythmic fingerpicking patterns provide a steady rhythmic foundation to a song, so you can sing out the melody of a song, or accompany other instrumentalists.

When you get your copy of Ukulele Exercises For Dummies, you will be able to download and listen to the audio demonstrations to hear exactly how the patterns and songs are played.

Pre-order the Book and Win a Free Ukulele

Kala Archtop KA-JTE Tenor UkuleleTo celebrate the book’s release, I am giving away a free, brand new Kala Archtop Tenor Ukulele KA-JTE!

This ukulele is quite special and one-of-a-kind in its appearance: it’s an archtop ukulele. You’ll notice there isn’t a round soundhole directly beneath the strings; instead, there are two F-holes. The ukulele comes equipped with a spruce top, mahogany back and neck, rosewood fingerboard, and electronics (that is, a pickup), so you can easily connect and plug in the ukulele to an amplifier.

To enter to win a Kala Archtop Ukulele KA-JTE ($300 value), follow these three easy steps:

  1. Pre-order two or more copies of Ukulele Exercises For Dummies (one for you and one to give to a friend) by April 15, 2013 (the book’s US release date).
  2. Forward me a copy of your receipt that confirms you purchased two or more copies of the book to: book [at] ukuleletricks.com
  3. On April 15th, when the book officially releases, I will randomly draw a winner and announce who it is right here on UkuleleTricks.com.

Again, you must pre-order two or more copies of the book to enter and email me your receipt. Ukulele Exercises For Dummies is available for pre-order for a special discounted price at any of the following online bookstores:

If you live in a country not listed here, post a comment, and I will try to help you find a way to pre-order the book.

My Sincere Thanks to You

I can’t overstate how thankful I am for your support. I’ve played music my entire life, and it’s truly a blessing and honor to be able to be supported by you, so I can help others learn how to play the ukulele. It’s unbelievable to me and I’m so thankful! To my students in the Ukulele Strumming Tricks course, thank you, and to those of you who will pre-order the book, I can’t thank you enough. I hope you enjoy.

Your Questions and Comments

Do you have a question about the book that I haven’t addressed here? Post a comment below and I can help you out!

And the winner of the Ukulele Tricks ukulele giveaway is…

$
0
0

Today, April 15th, 2013, I’m celebrating the release of my new book Ukulele Exercises For Dummies by giving away a Kala Archtop KA-JTE tenor ukulele ($300 value). The moment has finally come where I draw and announce the winner!

To select a winner, I had a little party on my back patio here in Detroit, MI. I put each individual entry into a big bowl, shuffled ‘em up, and from there, I randomly picked out one lucky winner. My brother Ian and friend Gabe even helped me record a video of the big event!

Congratulations to Kay Fraser for scoring a brand new ukulele. You are the winner!

To those who entered into the contest, thank you for celebrating the release of my new book with me. Again, I am so grateful for your support and encouragement at this exciting time.

If you are interested, get your copy of Ukulele Exercises For Dummies at any of the following online bookstores:

Thanks again, everyone.

Ukulele Exercises For Dummies now shipping in the US

$
0
0

For the last month, you could get my new book Ukulele Exercises For Dummies in Europe and even the far reaching corners of the world, like Dubai, but you couldn’t get it here in the US – the US release date kept getting pushed back. As of today, May 6th, 2013, I have some very exciting news for my US friends.

I’m very happy to announce that my new book Ukulele Exercises For Dummies is finally available in the US!

If you are in the US, order the book at Amazon here.

I’ve caught word from some US friends who pre-ordered the book that they are starting to receive their copies of the book in the mail. If you pre-ordered the book and haven’t received your copy yet, it’s on the way and I imagine you’ll be getting your copy in the mail very soon.

I’ve learned that this book publishing thing can really keep you on your toes. Again, thank you for your patience with the delay. I know how anxious you’ve been, as have I. I sincerely hope you enjoy the book and hope it’s been worth the wait for you.

Have you received your copy of the book yet? Where in the world are you located? Let me know in the comments area below!

7 Quick Tips to Improve Your Barre Chords on Ukulele

$
0
0

Barre chords can be the hardest kinds of chords to get down on the ukulele, but if you are able to play them, you unlock a whole new selection of chord variations and positions to choose from to add variety to those same old, boring chord progressions.

In this lesson, I give you some tips for your consideration that can help you play barre chords more cleanly and easily on the ukulele.

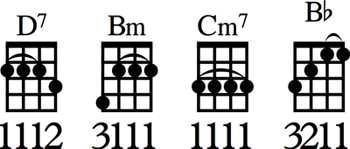
Incase you’re unfamiliar, when you play a barre chord, you are required to use a finger to fret or press down on multiple strings. Common examples of barre chords include: D7, Bm, Cm7 and Bb, as shown in the following diagrams.

Ukulele barre chords

Barre chords can be quite hard to switch to and fret, but give these quick tips a try to conquer these chords and open up some new possibilities in your ukulele playing.

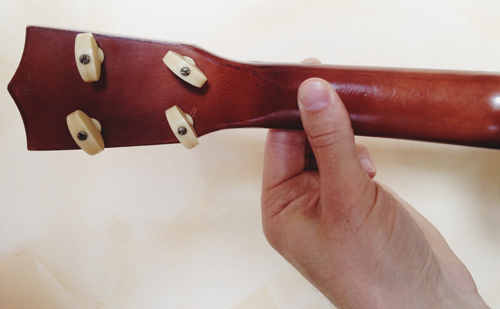
1. Check your thumb position.

A barre chord requires a bit more strength since you are pressing down multiple strings against the fretboard. To get the most leverage, ensure that the ball of your thumb is pressed firmly into the neck of the ukulele.

Barre chord back view

Use the ball of your thumb to press into the neck of the ukulele when playing a barre chord

2. Get closer to the fret.

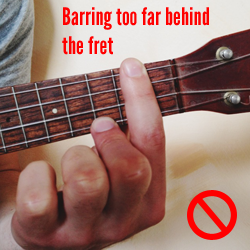
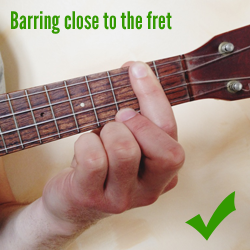
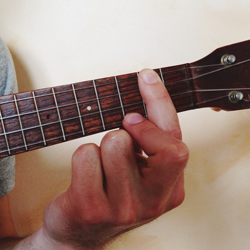
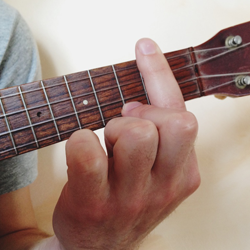
Aim to press down as close to right behind the fret as possible – almost as if you are pressing right down on the fret. Avoid barring way behind the fret. You’re able to hold down the strings easier the closer your fingers are to the fret. See what I mean as I play a D7 chord in the following images.

Barring too far behind the fretBarring close to the fret

In the figure on the right, it might seem as if the strings wouldn’t ring out clearly with my index finger that close on the fret, but I’ve positioned my finger so I maximize the leverage against the strings and get every string to ring out clearly.

3. Skip the half barre and use a full barre.

Some chords like Bb only require a half barre to play the chord, where your only barring the bottom two strings rather than all four on a fret. It can be hard to get the pressure you need with a half barre, so consider using a full barre instead. I show an example of this specifically for the Bb chord in this lesson here.

4. Double up your barre.

This isn’t always a feasible option, but in some cases, it can be helpful to lay your middle finger behind your index finger as you barre the strings. This makes your barre stronger and can allow the strings to ring out more clearly. This really only works for minor and minor 7th barre chords though (like Bm7, Cm7, C#m7).

Double finger barre

Using both index and middle fingers to barre a Cm7 chord on the ukulele

5. Isolate dead notes and adjust.

If you can’t get a barre chord to ring out, hold down the chord and pluck each individual string to see which note or notes aren’t ringing out. From there, experiment with adjusting the position of your barre on the strings. For example, to play some barre chords, you might focus on barring the strings with the bottom two knuckles of your finger, where you have a bit more meat and flesh to press down on the strings, rather than using the top two knuckles to barre the strings. The key is to be aware of these nuances, experiment and see what works best for you.

The following two images show me playing a D7 barre chord but I’m experimenting with the position of the barre using different knuckles on my finger to hold down the strings.

Barring with the top knucklesBarring with the bottom knuckles

6. Find an alternate position.

Typically, on the ukulele, you perform a barre with your index finger. However, you might find that using your middle finger works better in the context of certain chord progressions. For example, to play a D7 chord, I often like to use my middle finger to barre the 2nd fret and press down my ring finger on the 3rd fret of the bottom string, as shown in the following image.

Alternative D7 barre chord on the ukulele

7. Build strength with simple exercises.

If you’re finding that you’re still not able to get the hang of barre chords, be patient with yourself, because it takes a fair degree of strength in your fretting hand to hold down a barre. With time and practice, you find that playing barre chords is easier.

To help build strength, when you’re not playing the ukulele, you might take a tennis ball and practice squeezing it with a high degree of pressure for a few seconds and then relaxing. Repeat this a few times. It might seem like a pretty basic exercise, but it can certainly help you build strength in your fretting hand.

Remember: The key in all of this is to practice and experiment. It takes time and a lot of trial and error to play barre chords cleanly and smoothly. Some of these barre chords are downright awful to play, so be patient with yourself and keep at it.

What steps have you taken to improve your barre chords? What tips do you have for beginners who are struggling with barre chords? Let’s hear it! Post your comment below.

What People Are Saying About Ukulele Exercises For Dummies

$
0
0

Incase you missed it, just more than a month ago, my new book Ukulele Exercises For Dummies released in various places around the world.

Ukulele Exercises For Dummies is a practice-based ukulele book that helps you improve your skills on the ukulele in many different styles including strumming, fingerpicking, soloing, learning the fretboard and much more. Learn more about the book and get a sample chapter here.

If you picked up a copy of the book, thank you so much. I can’t express enough how grateful I am for your support. So far, the response has been very positive. I’ve been thrilled to hear how people are using the book to improve their ukulele skills.

Reviews and Testimonials

Here are just a few of the fantastic reviews and testimonials I’ve received from different readers for Ukulele Exercises For Dummies:

“For those bored by their practice routines, this should be an essential book to dip into and find inspiration.”

“If you are looking for a book that provides tons of exercise routines for the key facets of ukulele playing, you really should look no further as I don’t think there is much missing from this. Written by a player for players themselves, it’s got a style that works well and is clear to follow. For those bored by their practice routines, this should be an essential book to dip into and find inspiration.”

Barry Maz, Author of The Complete What Ukulele Players Really Want To Know

Read the full review on GotAUkulele.com

“Anyone that wants to take their ukulele skill to the next level, should highly consider getting this book.”

“You can tell the authors put lot of time and thought into coming up with these exercises that are very helpful in developing the right way of playing the ukulele. This book is definitely recommend for all levels but the beginners might get a bit intimidated by the content. But do not be afraid, the exercises are easy to learn if you take your time – and the best thing about this is that there are audio files you can download to listen to what you are suppose to be playing/sound like. I also love the size of this book – it is bigger (almost 8x10inches) so it feels like an exercise book that I can open up and read like a music tab book. The table of content is listed in a clear concise way and each chapters are well organized. Anyone that wants to take their ukulele skill to the next level, should highly consider getting this book.”

Kenny Kim, Ukulele Hobbyist and Author of Digital Wedding Photography Photo Workshop

Read the full review on Amazon.com

“This [book] stands out as one I consider essential for every student.”

“I’ve been a uke teacher for 15+ years and have devoured all the books I could get my hands on. This one stands out as one I consider essential for every student. Not only are the exercises perfect for skill building but they are fun! Most students hate drills/scales/exercises, etc but these are fun enough to want to do them and challenging enough to want to spend time working on them. Those are rare and wonderful qualities in books of this kind.”

Maria, Toronto-based music teacher at Music Lessons with Maria

Read the full review on Amazon.com

“You will learn something every time you open this book.”

“One stop shopping for the beginner. A great place to start your ukulele experience. Plenty of expert help to build a strong foundation or correct those bad habits you’ve formed. You will learn something every time you open this book. I got a hard copy and a Kindle version.”

John Sheckells, Ukulele Player

Read the full review on Amazon.com

These are just a few reviews of many. To read more, visit the book page on Amazon.com.

How to Buy Ukulele Exercises For Dummies

You can get your copy of Ukulele Exercises For Dummies at any of the following online bookstores:

If you prefer to work with your local bookstore, give them a call and they will be sure to get it in stock for you.

Thank you again for all of your support and telling your friends about my book. You rock! I am committed to making many more ukulele lessons and materials for you in the days and months ahead.


A Review of My New Custom M.J. Franks Concert Ukulele

$
0
0

As many of you know, this past year was a busy one for me between writing Ukulele Exercises For Dummies and continuing to provide support and instruction in my online ukulele course Ukulele Strumming Tricks. To celebrate and reward myself, I treated myself to a new ukulele made by my friend, the master and world-renowned luthier, Mike Franks.

Needless to say, I’ve been really enjoying the new ukulele (!), and I wanted to tell you all about it. I’m also getting a lot of questions about it after playing it in one of my recent video lessons 5 Effective Strumming Patterns for Beginners, which I hope to help answer here.

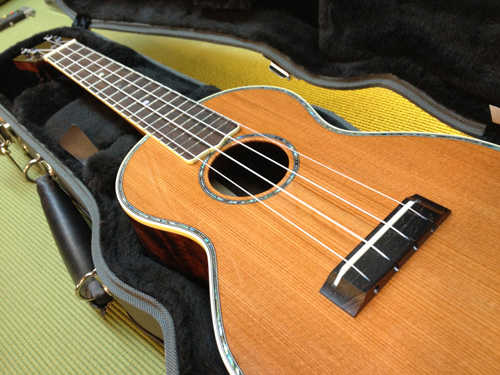
MJ Franks Concert Ukulele

My new M.J. Franks concert ukulele

For the last couple years, I’ve been playing a mahogany tenor-sized ukulele crafted and made by M.J. Franks (read about that here). I love the tenor size because it’s great for my larger fingers and hands, and it’s pretty versatile because you can tune it to low G tuning. This gives the ukulele a deeper, fuller sound. I think the tenor ukulele often sounds the best in low G tuning.

The problem I’ve run into though is that I want low G tuning, but I also want the ability to play in standard tuning. There’s something about standard tuning that gives you that classic ukulele sound. I’ve known for awhile that I’ve needed to get another ukulele to have the best of both worlds.

Since I’ve had such a great experience with my M.J. Franks tenor ukulele, I called up Mike Franks last year to see if I could hire him to build me a custom concert-sized ukulele.

Custom M.J. Franks Concert Ukulele Specifications

MJ Franks Concert UkuleleThe great thing about working with Mike is that you can customize a ukulele exactly to your liking. If you aren’t sure what you want, just let Mike’s expertise guide you.

Here is the ukulele Mike built me:

  • Brazilian rosewood back, sides, fretboard, bridge, headstock, and headplate
  • Redwood top
  • Honduran mahogany neck
  • Bone and nut saddle
  • Hand-cut paua abalone shell inlay for fretboard and purfling
  • Mother of pearl headplate inlay

Needless to say, Mike pulled out all the stops on this one! I can honestly say this ukulele is one of the finest crafted and best sounding instruments I’ve ever played.

One of the coolest parts about this ukulele is the very unique story behind the redwood top. I had to ask Mike to explain the details of the story to me:

“In the 1990s, a tonewood supplier named Craig Carter salvaged redwood trees which were blown down over the years from storms and such. Craig happened upon a log which had fallen across a ravine. The portion suspended in the air proved to have such exceptional tonewood qualities that he named it the “Lucky Strike” or “LS”. The LS tops are legendary and have sold for more than $1,000. You can read about the LS tops here or Google “Craig Carter LS”. I was lucky to obtain a piece of LS redwood that was not big enough for a guitar top but yielded a few ukulele tops. As far as I know, there are only 2 ukuleles with LS tops, yours & mine!”

As you can tell, this is quite a special instrument. It has exactly that classic ukulele sound I was looking for. It’s bright, lively and warm. The tone is crisp when strummed and crystal clear when fingerpicked. The intonation is spot on and it is tremendously easy to play up and down the fretboard (Mike hand-carved the neck and fretboard).

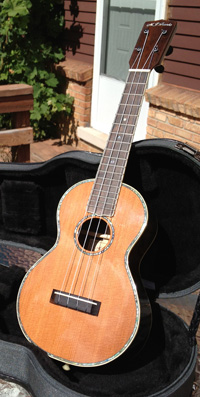
MJ Franks Concert Ukulele

“LS” redwood top and Brazilian rosewood back and sides

Here is a video of me playing “Ain’t She Sweet” on the new ukulele:

If you are looking to invest in an heirloom-quality, custom ukulele, I highly recommend working with Mike. I’ve heard from many of you who have had Mike build you a ukulele and have had a wonderful experience. You can find him on the web at M.J. Franks Guitars, his Facebook page here, or just give him a call at 586-703-2700.

Scroll down for some more pictures of the construction of the ukulele and the finished product from my time touring Mike Franks’ workshop.

MJ Franks Concert Ukulele construction

Construction of the new ukulele in the beginning stages; plus, Mike Franks playing an old Martin ukulele

MJ Franks Concert Ukulele construction

It’s coming together. This was before the gloss finish was applied.

Mike Franks' workshop

Mike Franks putting the final touches on the saddle

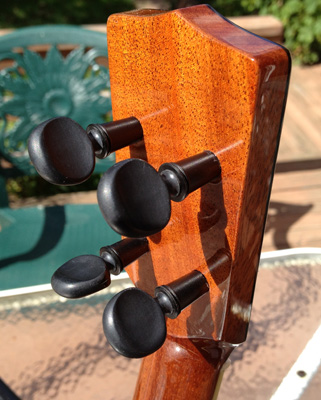
MJ Franks Concert Ukulele

Brazilian rosewood back and sides

MJ Franks Concert Ukulele

I couldn’t be happier. Thanks, Mike!

Get the brand new, interactive Ukulele Tricks lesson book, designed for the iPad

$
0
0

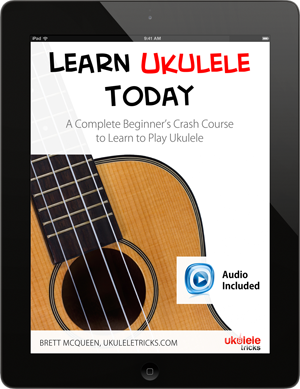
Learn Ukulele Today available on the iPadOver the past few months, I’ve been working on an exciting, new Ukulele Tricks project! Today, I get to reveal it to you.

I’m thrilled to announce a new, interactive Ukulele Tricks’ lesson book titled Learn Ukulele Today, now available on the iTunes iBooks Store.

Learn Ukulele Today, packed into an iBook format for the iPad, is one of the most interactive and intuitive, all-in-one lesson resources I’ve ever created to learn to play the ukulele, featuring a beautiful interface, easy-to-follow audio demonstrations, high-resolution images, and detailed ukulele notation, tab and sheet music.

For the aspiring, brand new, beginning ukulele player, Learn Ukulele Today is a complete crash course to learn how to play ukulele, covering everything from how to tune and hold your ukulele to playing actual songs. Everything you need to start playing the ukulele and improve your skills is right at your fingertips. This interactive 44-page book, formatted specifically for the iPad, is jam-packed with the most essential parts to playing the ukulele like:

  • How to properly tune, hold and strum the ukulele
  • The most essential “must-know” ukulele chords used to play thousands of songs
  • How to strum three easy, versatile strumming patterns
  • Four well-loved, beginner-friendly songs you can play to impress your friends and family

For your benefit, also included are playable audio demonstrations embedded right within the book allowing you to hear exactly how the ukulele is tuned and how the strumming patterns and songs should sound, as seen on the page. While being able to read sheet music is not required to follow along with this book, song notations, detailed images, illustrations and chord diagrams are included, to help you easily learn the concepts and techniques laid out in this book.

Get and download a sample of Learn Ukulele Today at the iTunes iBooks Store here.

Download Learn Ukulele Today on the iBooks Store

Learn Ukulele Today Table of Contents

To save yourself time, packed into 44 pages, Learn Ukulele Today is organized in a progressive, easy-to-follow manner, using detailed diagrams, illustrations, tabs, notation and audio tracks to demonstrate the concepts:

Chapter 1: Welcome
+ Start Playing Ukulele Today

Chapter 2: About the Ukulele
+ Exploring Ukulele Sizes
+ Parts of the Ukulele
+ Tuning Up Your Ukulele
+ Holding and Strumming the Ukulele

Chapter 3: Chords and Strumming
+ Your First Ukulele Chords
+ Your First Strumming Pattern
+ Your First Song

Chapter 4: Expanding Your Ukulele Skills
+ Must-Know Ukulele Chords
+ Varying Strumming Patterns

Chapter 5: 3 More Easy Songs You Can Play
+ “Auld Lang Syne”
+ “Camptown Races”
+ “I’ve Been Working On the Railroad”

Chapter 6: Further Resources
+ Where Do I Go From Here?
+ Final Thoughts

Get and download a sample of Learn Ukulele Today at the iTunes iBooks Store here.

Inside Look: Learn Ukulele Today

Learn Ukulele Today features a slick, beautiful design with many interactive elements available right at your fingertips including high-resolution images, audio demonstrations, tabs, notation, and more:

Learn Ukulele Today preview

Learn Ukulele Today preview

Learn Ukulele Today preview

Learn Ukulele Today preview

Learn Ukulele Today preview

Start Playing Ukulele Today

Maybe it’s been your lifelong wish to play an instrument. Maybe you have kids or grandkids you wish to play music with. Maybe you’re a teacher and are interested in using the ukulele in the classroom. Maybe you heard or watched someone play the ukulele and thought to yourself, “I can do that!” Wherever you’re coming from, Learn Ukulele Today, gives you everything you need to start making actual, beautiful-sounding music on the ukulele. 

Note: Learn Ukulele Today is designed for the iPad, but it can also be read and accessed using the iBooks program on a Mac computer with OS X Mavericks installed.

Get and download a sample of Learn Ukulele Today at the iTunes iBooks Store here.

Download Learn Ukulele Today on the iBooks Store

Introducing the ‘Fingerpicking Tricks’ online video lesson course

$
0
0

After more than a year and thousands of hours of work, Fingerpicking Tricks is here.

We’re so excited!

Fingerpicking Tricks is a brand new online video lesson course giving you an easy-to-follow, step-by-step method to becoming a master of fingerpicking on the ukulele.

Sign up for Fingerpicking Tricks now.

The course is designed for ukulele players who wish to go beyond the basics of playing the ukulele and explore four distinct styles of fingerpicking the ukulele: pattern-based fingerpicking, arpeggio-based fingerstyle, melodic-based fingerstyle, and solo fingerpicking.

You have everything you need to become a proficient fingerpicker on the ukulele.

Here’s what you get in the course:

  • Learn fingerpicking on the ukulele with over 7 hours of easy-to-follow, high-definition video instruction (89 total videos)
  • Explore fingerpicking in four distinct styles: rhythmic-based fingerpicking, arpeggio-based fingerstyle, melodic-based fingerstyle, and solo fingerpicking
  • Follow along with step-by-step, organized and detailed printable worksheets (168 pages)
  • Discover the techniques used to fingerpick the ukulele as a solo instrument
  • Expressively play 24 different pieces: everything from modern and classic ukulele songs all the way to pieces by Bach, Beethoven, and Tárrega
  • And much more…

Learn more about Fingerpicking Tricks here.

Listen to the Songs You Learn in Fingerpicking Tricks

When it comes to fingerpicking the ukulele, there are four main styles: rhythmic-based fingerpicking, arpeggio-based fingerstyle, melodic-based fingerstyle, and solo fingerpicking.

These four styles cover every kind of fingerpicking you could possibly think of or perform on the ukulele.

Pattern-Based Fingerpicking

Pattern-based fingerpicking is a style of fingerpicking where you fingerpick the rhythm of a song in a repeating fingerpicking pattern while you sing the melody of the song.

Fingerpicking in this style is a great place to start if you’re brand new to fingerpicking or if you’re looking for fresh, new ways to add variety and flavor to the sound of a song you might normally strum.

Watch this preview of a rhythmic fingerpicking rendition of the Hawaiian ukulele classic Aloha ‘Oe.

Arpeggio-Based Fingerstyle

Fingerstyle differs from the rhythmic fingerpicking patterns you learn in that fingerstyle songs are only fingerpicked–there is no singing in fingerstyle.

In the style of arpeggio-based fingerstyle, learn a kind of fingerstyle that relies solely on repeating fingerpicking patterns called arpeggios.

Listen to this piece in the style of arpeggio-based fingerstyle you learn called Étude in E Minor by the Francesco Tárrega.

Melodic-Based Fingerstyle

In the style of melodic-based fingerstyle, pieces feature a distinct fingerpicked melody along with beautiful fingerpicked harmonies.

Watch the following performance of Beethoven’s Für Elise–one such piece in the style of melodic-based fingerstyle.

Solo Fingerpicking

Solo fingerpicking is a style of fingerpicking that allows you to strum and fingerpick the melody of a song that is normally sung.

This means you don’t have to be a good singer to play and enjoy your favorite songs on the ukulele.

Check out this performance of Blue Bells Of Scotland in the solo fingerpicking style on the ukulele. Notice how the melody of the song is fingerpicked and strummed throughout.

These are just a few of the songs you learn in Fingerpicking Tricks.

Discover more and sign up for Fingerpicking Tricks here and start your first lesson today.

I can’t wait for you to get started.

Ukulele bringing hope to survivors of human trafficking in India

$
0
0

Survivor Girls Ukulele Band

Today, I bring to you a remarkable story from Laurie Kallevig of the Survivor Girl Ukulele Band project.

Survivor Girl Ukulele Band is using the healing power of music and love through the ukulele to bring restoration and hope to survivors of human trafficking in Kolkata, India.

Survivor girls–girls who have been rescued from forced prostitution–are able to come and be apart of Survivor Girl Ukulele Band and learn how to play the ukulele, finding confidence, joy, and freedom.

I had a chance to speak with Laurie and learn more about this inspiring little ukulele band.

Brett: What is Survivor Girl Ukulele Band?

Laurie Kallevig: Survivor Girl Ukulele Band (SGUB) is a project in India bringing restoration and hope to survivors of human trafficking through the healing power of music and love.

With twenty-four colorful ukuleles in tow and heaps of love and support from friends and family, I travel to India, and then I teach survivor girls — girls who have been rescued from forced prostitution — how to play ukulele! It’s wild, it’s fun, it’s therapeutic, and it’s creative — and it also hopefully teaches the girls how to learn.

My students all have their individual stories, but these girls and young women have been through much trauma, and it’s not uncommon for them to believe that they are stupid, that they can’t learn, and that they are worthless. Those beliefs are reinforced by the fact that they have had very little education, and they don’t really know how to learn. Often they have little confidence in trying anything new because they are convinced beforehand that they can’t do it. So when they do catch something they thought they couldn’t do, wow! Their smiles light up the room!

Survivor Girl Ukulele Band 2015 — Kolkata! has made history: two talented students are now part-time employees of SGUB as “chota teachers” (little teachers), and they help teach the new beginner classes. And each class is working on songs to perform for a crowd of 250 people on Sanlaap’s 30th anniversary on June 30th, 2015!

Survivor Girls Ukulele Band

Brett: What inspired you to work in India?

Laurie: Years ago I was traveling in India, Nepal, and Tibet, and it was in Tibet I learned from a fellow traveler that each year thousands of girls are trafficked from Nepal into India — often tricked with promises of a good job — and then sold in to brothels.

This bothered me for years, but I felt I had nothing to offer. Then one night I woke up with the words “rescue and restore” in my head. And I knew it was time to do something, to get involved somehow.

So I came to India and volunteered in the communications department of a number of anti-trafficking organizations. And one day I had the opportunity to go into the field for a training. I brought my guitar and sang “Happy Birthday” and “Twinkle, Twinkle Little Star” with the girls. What a hit! The girls zoomed up to the guitar and asked how it worked and could they try it.

I knew I couldn’t teach girls how to play the guitar — I could barely play it myself! But earlier in the year I had met someone on a plane who had a ukulele. She said, “You can have a lot of fun on a ukulele.” I thought to myself, why not learn how to play the ukulele, get a bunch of ukuleles, and come back to India and form a survivor girl ukulele band?!! And that’s how it all started.

Survivor Girls Ukulele Band

Brett: What is a typical SGUB practice like?

Laurie: At the beginning of class, one of the girls leads and the others repeat these words in Bengali and in English:

I am intelligent. I am brave. I can do this. Lord, please help me. Amen.

This is followed by one minute of silent meditation, and then we jump into playing songs.

One of the first songs they learn is “Twinkle, Twinkle Little Star.” We’re also working on a classic Bengali love song — “Purano Sei Diner Kotha,” as well as “Happy Birthday,” and Pachelbel’s “Canon in D.”

As they progress with a song, I throw in techniques like fingerpicking, hammer-ons and slides.

Most important is that the girls have fun, that they are successful, and that it is a safe and loving environment.

Survivor Girls Ukulele Band

Brett: What is your hope for the girls who play in SGUB?

Laurie: I hope they learn how to learn and continue to learn and grow. I hope they feel loved. I hope they feel joy and freedom when they play. I hope they continue their journey toward wholeness and restoration. And I hope that a good number of students will find dignified, meaningful, and creative employment teaching ukulele through future expansion of SGUB or collaboration with other music projects.

Brett: Any favorite songs the band likes to play?

My friend Ed Tree wrote Survivor Girl Ukulele Band song for the girls, and it captures the essence of what SGUB is all about. The girls love to sing and play it.

Survivor Girl Ukulele Band

If you’re down, we’ll lend you a hand
If you’re lost, we’ll show you a plan
If you’re scared, we will understand
Survivor Girl Ukulele Band

No matter who you are
No matter where you’ve been
The door is always open
We will let you in

There’s a brighter day
There’s another choice
There’s a melody
Waiting for your voice

If you’re down, we’ll lend you a hand
If you’re lost, we’ll show you a plan
If you’re scared, we will understand
Survivor Girl Ukulele Band

See who you can be
See how you can grow
See what life will bring
Blessings overflow

There’s a brighter day
There’s another choice
There’s a melody
Waiting for your voice

If you’re down, we’ll lend you a hand
If you’re lost, we’ll show you a plan
If you’re scared, we will understand
Survivor Girl Ukulele Band

Survivor Girls Ukulele Band

Brett: What’s been the biggest challenge starting SGUB?

Laurie: The biggest challenge for me for the three years I have done Survivor Girl Ukulele Band has been buying a plane ticket and leaving friends and family and car and air-conditioning and kitchen and the USA.

Once I’m in india, however, there’s always so much going on that I don’t have much time to miss the comforts of home. But leaving setting a date and packing up and getting out the door is very difficult!

Brett: What advice would you give to a person wanting to start a ukulele band or club in their community?

Laurie: Local music stores are often great places to hold ukulele jams. Print out some very easy songs in the key of C, set a time and date, advertise it in the local paper, and have a blast! Ukulele is so fun and ukulele people are so friendly. I think that if you start a ukulele band or club or jam it will catch on in no time.

Brett: How can we learn more and be a part of SGUB and the work you’re doing?

Laurie: To learn more about Survivor Girl Ukulele Band project, please visit my website and blog and sign up for the newsletter at sgub.org and workingdraft.me.

If you live in the Los Angeles area, please join us at the next Survivor Girl Ukulele Band benefit (upcoming November 2015–website will have details in the coming months).

If you live in New Zealand, Ukulele Geraldine’s Ukefest in early July 2015 will have a fundraiser for SGUB.

If you are part of a ukulele club, consider hosting a fund-raiser for survivor girl ukulele band project. Or you can be a friend and tell a friend about Survivor Girl Ukulele Band!

Survivor Girls Ukulele Band

Survivor Girls Ukulele Band

7 Tips to Learn to Play Ukulele Faster

$
0
0

Note: This is a guest post from Eduardo Uke of EasyUkuleleSongs.com.

Hello my ukulele friends! I have a question for you. Have you ever felt stuck while learning to play the ukulele?

Then this is the perfect time we go over the ultimate guide to learning how to play the ukulele faster.

From my experience playing different instruments, the most difficult part is getting stuck with the feeling of no progress.

If you’ve ever felt like there is a stumbling block in your way or a barrier holding you back from getting to the next level of your ukulele learning journey – then this guide is for you my friend.

The goal of this guide is to completely remove stumbling blocks in the form of bad habits and incorrect routines. Once these are out the way, just imagine how fast you will see progress and breakthrough in your ukulele adventure.

This is above all meant to be super fun. Which is the reason I encourage everyone to take up the uke in this podcast episode. So continue with a smile :)

How would you define music first of all? I see music as a beautiful array of sounds that work together and support each other. Almost like a rainbow. You see how the colors are diverse yet they flow together in the same direction in unison. Pretty neat right?

This takes us to our first tip that you absolutely do not want to miss if you want to make effective and efficient progress.

1. Develop the habit of tuning your ukulele before playing

Playing a ukulele that is out of tune may frustrate your experience when attempting to learn new songs. You’ll find the notes you strum don’t quite match what you are listening to. Learning the chords to a song while your ukulele is out of tune will get you stuck. You may know where to place your fingers on the fretboard but the actual notes you are playing are not the intended notes from a tuned ukulele.

For this reason, before you start playing, you want to make sure that the first thing you do is tune your ukulele. There are a couple of ways to do this but the best way is to use an electronic tuner or the Ukulele Tricks online ukulele tuner.

The electronic tuner I usually like to buy is Snark SN2. This is the one I use myself and does a great job with accurately detecting the tunings of each string. As long as you take care of the tuner, it will last a long time.

2. Maintain Form and Good Posture

Holding the ukulele correctly is one of the most important fundamentals to get right at the beginning. An uncomfortable position will hinder your experience while learning. Poor posture can add unnecessary strain on certain parts of your body. Since you want to have fun while learning the uke, it would be no fun to feel strain in your muscles or joints.

If you’re sitting down while playing the uke, make sure to sit upright. Try your best not to arch your back as this is an unnatural position. Keep your back straight.

Next you want to support your uke right below your chest. This is the optimal area to hold the ukulele. You use your forearm to hold the body of the ukulele in place. The hand you use to hold down chords on the fretboard is the final support for the positioning of your uke.

3. Learn the Top 5 Most Popular Ukulele Chords

The majority of songs you learn as a beginner will very likely have these chords. The top 5 are:

  • C Chord
  • G Chord
  • F Chord
  • D Chord
  • A Chord

You can search for these chords in the Ukulele Tricks Chord Library.

There are hundreds of chords you can learn. But the reality is that the great majority of songs out there use these popular chords.

To practice these chords, I suggest for you to learn these chords using a metronome at a slow pace and steadily increase the tempo or speed while taking breaks in between.

So for example: play the C chord at 65 BPM for 1 minute. Take a 10 second break, then repeat this 3 times before you move to the next common chord. After you get the hang of this, for the last of these top 5 chords, feel free to increase the pace.

4. Take Breaks and Repeat

There is a science and art behind learning how to play an instrument (or anything else in fact). The process I’m referring to is developing what is called “Muscle Memory”.

It’s the way your motor activity or movements are recorded into memory. Your memory will record the chord progressions you are playing, for example. So if you are playing the C chord, then you play E minor, then F repeatedly–this movement becomes so ingrained in muscle memory that it becomes easier to play without conscious effort after repetitions. So playing the song becomes more automatic without as much focus.

To make the most out of learning how to play songs ‘effortlessly’ you must take breaks often. As you repeat songs and different chords, you want to take breaks often so that the muscle memory can take the time to record your practice.

You’ll find that every time you go back to playing the song, it indeed becomes easier and more automatic to play.

5. Use a metronome to play in time

Music is precise when it comes to time. I’ve had the wonderful experience of recording in studios before. One of the very first things to do before recording is to use what is called a “Click Track”. This is a recurring beat that keeps everything in perfect timing. So when the musicians record the different instruments they all play according to the same time.

You might be wondering, “How can I play in time?” For this you need to use a metronome. It is an electronic tool that simply beeps in sequence. You can set the speeds it beeps in. So just to give you an example, “Somewhere Over The Rainbow” is a song that plays at just about 85 Beats Per Minute (BPM). So you would set the metronome to 85 BPM and play according to the beats.

Here is the ukulele trick that will get you learning faster… Are you ready?

The trick is to play slower. That’s correct, playing slower is the trick to learning faster.

The way you would go about this is to first set a goal. Let’s say the goal is to achieve playing “Somewhere Over The Rainbow” comfortably. This then means that your goal is 85BPM. Let’s now break this down to mini goals and you are on your way to playing the song like never before.

Your first mini goal is to play this song at the rate of 65BPM. This speed is significantly slower than the original pace of the song. This is intentional and is the first goal to achieve before moving forward. Once you play the song chords at 65BPM, for your next goal, increase the speed to 70BPM. Continue to add 5BPM increments until you are playing the song at 85BPM.

As I often like to say, practice makes progress. For best results, do not rush through your first goal.

6. Hum Song Lyrics While Playing Slowly

One of the most enjoyable things to do while playing the uke is singing your favorite songs. If you find singing and playing ukulele at the same time to be challenging then all of the tips we previously covered will benefit you greatly.

In this tip, we want to hum while playing and using a metronome so we can pace ourselves. Make sure to start with only a basic down-down strumming pattern. We then want to play a certain section of a song repeatedly while humming the song lyrics.

The reason why we will hum the song verses is that we want to get familiar with playing the uke at the same time as getting used to using our voice. Our focus is more on the strumming of chords with right timing and just barely singing–all at the same time. Lyrics wouldn’t be a concern at this point. We just want to get comfortable doing this.

If you use the strategy of using a metronome to pace yourself at a slow tempo and steadily increasing, you will see success in your progress.

7. Sing While Playing Basic Strumming Patterns

Now at by this stage you are getting accustomed to playing in tune, on time, and navigating between chords easily. You can also play your select song while humming it comfortable.

Now we want to shift our focus and give more attention to actually singing the words of the song. At this point you should continue using a basic down-down strumming pattern. As you play the song with a metronome at a slow tempo (for example, 65BPM) you should now sing the words. At this very slow pace you will be comfortable playing the chords and keeping rhythm of the song. Using the the above tips you will certainly learn how to play ukulele faster.

As you progress in singing and playing at a faster tempo with the basic strumming pattern, feel free to get more creative and use other strumming patterns.

This sums up the best learning tips that will help you learn faster and therefore progress faster. To recap this guide, here are the pointers to always follow for best results:

  1. Always tune your ukulele before playing
  2. Make sure to use comfortable and natural posture
  3. Learn the most popular uke chords
  4. Repeat what you practice and take breaks often
  5. Use a metronome to be consistent with timing
  6. Learn to hum a song while playing
  7. Sing and strum a song at the same time with the above tips

I hope you enjoyed this article and that it becomes a standard you will use to learn faster and become a better ukulele player. If this guide helps, share it with your friends! We’d also love to hear how this learning process has helped you in the comment section below.

This is Eduardo Uke – over and out!

Eduardo Uke is an avid ukulele teacher and podcast host. Want more tips on learning to play the uke easier and faster? Subscribe at his website EasyUkuleleSongs.com and receive a free ebook today.

Viewing all 86 articles
Browse latest View live